


The sauna is a simple, not elaborate, structure which is
relatively inexpensive to
build. Basically, it consists of a steam room, a shower, and a dressing room.
If you're not at all sure how you're going to tackle this
project, we suggest you get
some help in the very beginning to get started on the right path. We gladly provide
this
service. If you can provide us with some information about
the space you have
available either verbally or with pictures, we can offer our suggestions on the layout
or building of
your sauna. You can contact us by phone 8am - 8pm EST
(1-906-482-6604
& 1-800-41-SAUNA), mail (A & L Fabricating, HWY M-26,
P.O. Box 319, Dollar Bay,
MI, 49922), fax (1-906-482-6604), or e-mail (ilosauna@gmail.com).
The walls and ceilings of the steam room are heavily
insulated with all inside
surfaces made of unfinished wood
to absorb and diffuse moisture. Cedar and cypress,
where available, are excellent. Redwood does a fine job, but darkens
with age. Basswood
and poplar work well as they are
naturally white and less costly. Any wood without
pitch
works successfully.
A removable slatted wood cover on the floor is desired on
cement or ceramic to
reduce the risk of slipping.
Tile, metal, or masonry on the walls of the steam room are
absolutely unsuitable -
they make the sauna an
uncomfortable experience.
A low ceiling increases efficiency.
If possible, there should be a floor drain in the steam room.
The wooden benches in the steam room are usually located
at two or more levels.
Those who prefer more heat would sit at a higher level, while those who prefer it a
little cooler
would sit at a lower level. When sitting on the upper benches,
the head
should be close to the ceiling as most of the heat rises. The family sauna should be
large enough so that one bench is long and wide enough for a person to lie
comfortably
and relax. Relaxation is what a sauna's all about!
Generally,the shower is inside the steam room, though
it can just as well be in an
adjacent area or room. If running
water is not available, it can be carried into the sauna
in
buckets. Note: This really is the traditional way.
A sauna can be built to fit any space or surrounding and
built in any style you
desire. It can be installed in a basement, garage or built as a separate structure. A
sauna may help dry a normally damp basement. Excess moisture is not an
important
consideration as the humidity is actually very low.
An advantage of a sauna within a house is that only the
steam room need be constructed
if the shower and/or relaxation facilities already exist.
The size of your sauna will depend on the number of
people likely to use it at one
time. The cubic feet of the sauna
determines the heater size.
Click here to find the
right size from our chart. You will
be able to get right back
here when you're done with the link
under the table.
THE BASIC TOOLS
NEEDED:
Eye Protection
Work gloves
Ruler
Hammer
Level
Square
Countersink set
Saw
Some means of making accurate miter cuts (miter box or miter saw). If you have a
miter saw, check out the Mighty MiteR
Pencils
Drill
Screw gun or Screwdrivers
Depending on construction, suitable adhesives and caulking gun.
Electrical tools for stripping and making wire connections
If you have friends and neighbors, cold beer is optional if they're so inclined
A great way to help you with the construction your sauna
is by using the Mighty MiteR
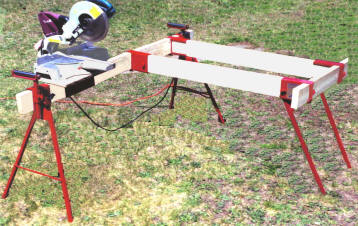
The Mighty MiteR allows you the
versatility to make your miter stand any length
needed. All you must have is a good,
strong, straight 2 x 6.
When assembled, it is more than strong enough to accommodate any
industrial-rated
compound or standard miter saw.
All brackets are formed using heavy 7 gauge (3/16") steel with a
red enamel finish.
All knobs are heavy industrial grade for lifetime use.
All legs have inserts that are non-marring and non- scratching.
For alot more information on the Mighty
MiteR- click here.
The Table
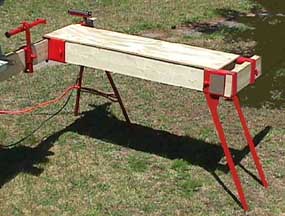
This extremely handy accessory consists of two
brackets and two legs made from
heavy 3/16" (7 gauge) steel. It can be easily made to
any length or width depending
on your needs. It can be attached to the Mighty MiteR
or it can stand on it's own!
Click on the picture of the table above to go to the
beginning of the table's page.
These are just some of the ways it can be put
together, but the possibilities are endless!.....
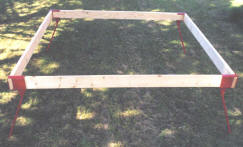
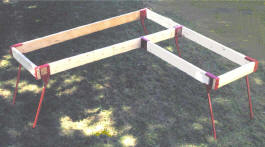
Click on either picture to go to the different ways you can put it together.
Once you're
there, you can scroll up to learn all about it!
A TYPICAL SAUNA LAYOUT

Some Sauna Specifics :
 | A good size for a sauna steam room is about 8'L x 6'Wx 7' H. The size of ILO
you would put in this room
would be a RAD-9KW. |
| 2"x 4" studded construction with inside paneling and
insulation as noted gives
best results. Avoid hard
surfaces such as metal, porcelain, and ceramics.
They'll get uncomfortably hot and can actually burn the
skin. |
| A floor drain rids the steam room of excess water
and is an aid in cleaning. |
| Insulation on ceilings require 2" of urethane foam or 6"of fiber glass. Walls need
1" or more of urethane foam
or 3" or more of fiberglass. |
| Benches are constructed of 2" X 8" , 2" X 10" or 2" X 12"
boards of cedar, bass,
poplar, or redwood - planed and
sanded, but unfinished. Use stainless steel
screws or
nails for all fasteners on benches. Teflon screws are
now becoming
available and will work great. All screws and nails must be recessed (countersunk). |
| ILO™ Radiant Electric Sauna Heater must be located
6" or more from
combustible surfaces in an open and
exposed position. May be closer or next to
wall if a heat shield
is placed between heater and wall. We manufacture
these
shields if needed. |
| For safety, a wooden railing around the heater is a must. |
| Inner walls and ceiling should be of any wood without
pitch - such as cedar,
basswood, poplar, or redwood.
This must be left unfinished to avoid objectionable
odors and absorb and
diffuse heat. Hot dipped
galvanized, stainless steel, or brass screws and nails
should be used throughout and be countersunk. |
| A door can be fabricated by starting with a properly
sized piece of vertical or
horizontal paneling, then
fastening wood to match or accent the wall surfaces. |
| Sometimes windows are added between the sauna and
the change room. If
thermal pained windows are used, they can also be on an outside wall. |

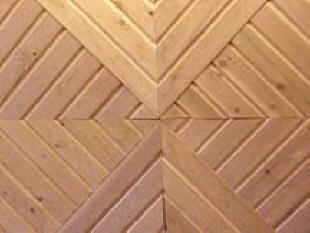
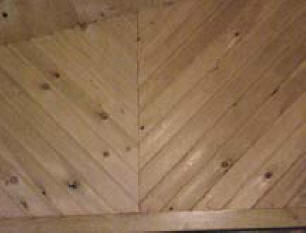
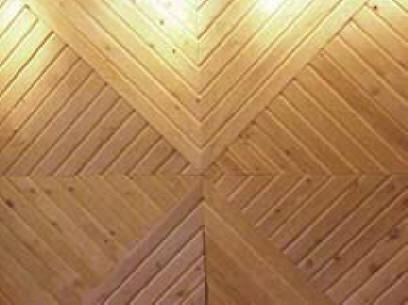
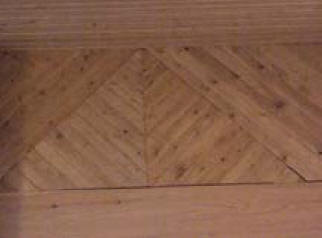
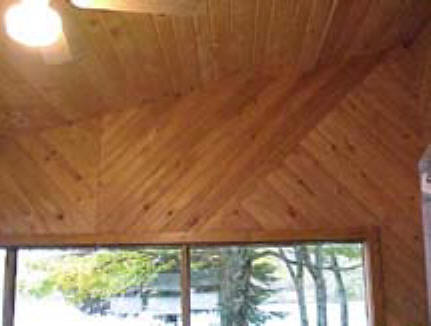
Here are some ways you can get "wild" with a miter saw and
create some interesting
geometric designs and patterns. Surprisingly, you'll use
much
less material than with
conventional construction as the shortest pieces of
material can be utilized.
 get back to Sauna FAQ here
To answer any questions you may have that we have not
covered, please feel free to call Paul, Lorri,
or Lynn at any time
Mon.-Sat 8AM-8PM EST. 1-906-482-6604 &
1-800-41-SAUNA.
Our e-mail address is ilosauna@gmail.com

